Related
Tutorial
How To Set Up a Basic Iptables Firewall on Centos 6
Intro
This article will show how to create a simple firewall on a Centos VPS. It will only open up ports that we want and close up other services. I will also show how to prevent simpler attacks, and how to let yourself back in to the VPS if you deny access to yourself by accident.
The tutorial is not by any means exhaustive and only shows how to open up a few incoming ports: for apache, SSH and email and close all the others. We will not be blocking any outgoing traffic, and only create a few most common rules to block the usual scripts and bots that look for vulnerable VPS.
iptables is a simple firewall installed on most linux distributions. The linux manual page for iptables says it is an administration tool for IPv4 packet filtering and NAT, which, in translation, means it is a tool to filter out and block Internet traffic. iptables firewall is included by default in Centos 6.4 linux images provided by DigitalOcean.
We will set up firewall one by one rule. To simplify: a firewall is a list of rules, so when an incomming connection is open, if it matches any of the rules, this rule can accept that connection or reject it. If no rules are met, we use the default rule.
Note: This tutorial covers IPv4 security. In Linux, IPv6 security is maintained separately from IPv4. For example, “iptables” only maintains firewall rules for IPv4 addresses but it has an IPv6 counterpart called “ip6tables”, which can be used to maintain firewall rules for IPv6 network addresses.
If your VPS is configured for IPv6, please remember to secure both your IPv4 and IPv6 network interfaces with the appropriate tools. For more information about IPv6 tools, refer to this guide: How To Configure Tools to Use IPv6 on a Linux VPS
Decide which ports and services to open
To start with, we want to know what services we want to open to public. Let’s use the typical web-hosting server: it is a web and email server, and we also need to let ourselves in by SSH server.
First, we want to leave SSH port open so we can connect to the VPS remotely: that is port 22.
Also, we need port 80 and 443 (SSL port) for web traffic. For sending email, we will open port 25 (regular SMTP) and 465 (secure SMTP). To let users receive email, we will open the usual port 110 (POP3) and 995 (secure POP3 port).
Additionally, we’ll open IMAP ports, if we have it installed: 143 for IMAP, and 993 for IMAP over SSL.Note: It is recommended to only allow secure protocols, but that may not be an option, if we cannot influence the mail service users to change their email clients.
Block the most common attacks
DigitalOcean VPSs usually come with the empty configuration: all traffic is allowed. Just to make sure of this, we can flush the firewall rules – that is, erase them all:
iptables -F
We can then add a few simple firewall rules to block the most common attacks, to protect our VPS from script-kiddies. We can’t really count on iptables alone to protect us from a full-scale DDOS or similar, but we can at least put off the usual network scanning bots that will eventually find our VPS and start looking for security holes to exploit. First, we start with blocking null packets.
iptables -A INPUT -p tcp --tcp-flags ALL NONE -j DROP
We told the firewall to take all incoming packets with tcp flags NONE and just DROP them. Null packets are, simply said, recon packets. The attack patterns use these to try and see how we configured the VPS and find out weaknesses. The next pattern to reject is a syn-flood attack.
iptables -A INPUT -p tcp ! --syn -m state --state NEW -j DROP
Syn-flood attack means that the attackers open a new connection, but do not state what they want (ie. SYN, ACK, whatever). They just want to take up our servers’ resources. We won’t accept such packages. Now we move on to one more common pattern: XMAS packets, also a recon packet.
iptables -A INPUT -p tcp --tcp-flags ALL ALL -j DROP
We have ruled out at least some of the usual patterns that find vulnerabilities in our VPS.
Open up ports for selected services
Now we can start adding selected services to our firewall filter. The first such thing is a localhost interface:
iptables -A INPUT -i lo -j ACCEPT
We tell iptables to add (-A) a rule to the incoming (INPUT) filter table any trafic that comes to localhost interface (-i lo) and to accept (-j ACCEPT) it. Localhost is often used for, ie. your website or email server communicating with a database locally installed. That way our VPS can use the database, but the database is closed to exploits from the internet.
Now we can allow web server traffic:
iptables -A INPUT -p tcp -m tcp --dport 80 -j ACCEPT
iptables -A INPUT -p tcp -m tcp --dport 443 -j ACCEPT
We added the two ports (http port 80, and https port 443) to the ACCEPT chain – allowing traffic in on those ports. Now, let’s allow users use our SMTP servers:
iptables -A INPUT -p tcp -m tcp --dport 25 -j ACCEPT
iptables -A INPUT -p tcp -m tcp --dport 465 -j ACCEPT
Like stated before, if we can influence our users, we should rather use the secure version, but often we can’t dictate the terms and the clients will connect using port 25, which is much more easier to have passwords sniffed from. We now proceed to allow the users read email on their server:
iptables -A INPUT -p tcp -m tcp --dport 110 -j ACCEPT
iptables -A INPUT -p tcp -m tcp --dport 995 -j ACCEPT
Those two rules will allow POP3 traffic. Again, we could increase security of our email server by just using the secure version of the service. Now we also need to allow IMAP mail protocol:
iptables -A INPUT -p tcp -m tcp --dport 143 -j ACCEPT
iptables -A INPUT -p tcp -m tcp --dport 993 -j ACCEPT
Limiting SSH access
We should also allow SSH traffic, so we can connect to the VPS remotely. The simple way to do it would be with this command:
iptables -A INPUT -p tcp -m tcp --dport 22 -j ACCEPT
We now told iptables to add a rule for accepting tcp traffic incomming to port 22 (the default SSH port). It is advised to change the SSH configuration to a different port, and this firewall filter should be changed accordingly, but configuring SSH is not a part of this article.
However, we could do one more thing about that with firewall itself. If our office has a permanent IP address, we could only allow connections to SSH from this source. This would allow only people from our location to connect.
First, find out your outside IP address. Make sure it is not an address from your LAN, or it will not work. You could do that simply by visiting the whatismyip.com site. Another way to find it out is to type:
w
in the terminal, we should see us logged in (if we’re the only one logged in’ and our IP address written down.
The output looks something like this:
root@iptables# w
 11:42:59 up 60 days, 11:21,  1 user,  load average: 0.00, 0.00, 0.00
USER     TTY      FROM              LOGIN@   IDLE   JCPU   PCPU WHAT
root   pts/0    213.191.xxx.xxx  09:27    0.00s  0.05s  0.00s w
Now, you can create the firewall rule to only allow traffic to SSH port if it comes from one source: your IP address:
iptables -A INPUT -p tcp -s YOUR_IP_ADDRESS -m tcp --dport 22 -j ACCEPT
Replace YOUR_IP_ADDRESS with the actuall IP, of course.
We could open more ports on our firewall as needed by changing the port numbers. That way our firewall will allow access only to services we want. Right now, we need to add one more rule that will allow us to use outgoing connections (ie. ping from VPS or run software updates);
iptables -I INPUT -m state --state ESTABLISHED,RELATED -j ACCEPT
It will allow any established outgoing connections to receive replies from the VPS on the other side of that connection. When we have it all set up, we will block everything else, and allow all outgoing connections.
iptables -P OUTPUT ACCEPT
iptables -P INPUT DROP
Now we have our firewall rules in place.
Save the configuration
Now that we have all the configuration in, we can list the rules to see if anything is missing.
iptables -L -n
The -n switch here is because we need only ip addresses, not domain names. Ie. if there is an IP in the rules like this: 69.55.48.33: the firewall would go look it up and see that it was a digitalocean.com IP. We don’t need that, just the address itself. Now we can finally save our firewall configuration:
iptables-save | sudo tee /etc/sysconfig/iptables
The iptables configuration file on CentOS is located at /etc/sysconfig/iptables. The above command saved the rules we created into that file. Just to make sure everything works, we can restart the firewall:
service iptables restart
The saved rules will persist even when the VPS is rebooted.
Flush to unlock yourself
If we made an accident in our configuration, we may have blocked ourselves from accessing the VPS. Perhaps we have put in the incorrect IP address so the firewall does not allow connections from our workstation. Now we can’t reach those rules, and if we saved them, even a restart won’t help us. Luckily, the DO web interface allowes us to connect to server via console:
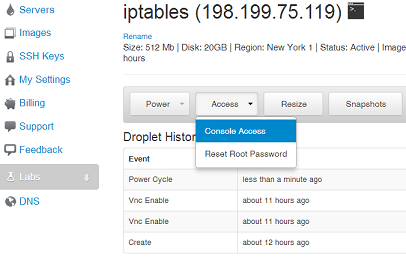 Once connected, we log in as root and issue the following command:
iptables -F
This will flush the filters, we’ll be able to get in the VPS again.
Conclusion
This article is not exhaustive, and it only scratched the surface of running a simple firewall on a linux machine. It will do enough for a typical web and email server scenario for a developer not familiar with linux command line or iptables.
However, a lot more could be done. There are good tutorials and samples on the internet to help us provide more robust configuration. For production environments, it would be advised to create a more detailed configuration or to have a security expert prepare the configuration.
Hopefully, the short instructions will provide basic security to new VPSs.
-
If I want to forward port 80 to 8080 for a webserver listening on 8080, how would I do that in this table?
-
iptables -A PREROUTING -t nat -i eth1 -p tcp –dport 80 -j REDIRECT –to-port 8080 use this….
-
I tried using ‘sudo iptables-save > /etc/sysconfig/iptables’ while logged in as superuser I created with all permissions, but got a permission denied. Did a little research and used the following command to save the configurations ‘sudo /etc/init.d/iptables save’ on CentOS Additionally for Debian/Ubuntu I believe the command is sudo vi /etc/network/interfaces
-
If I want to use postfix on my server to relay SMTP to gmail (i.e. send email from my server via gmail) ONLY, do I need any iptables rules? Right now, things are locked down to standard HTTP and SSH ports and that’s it. Not sure if I need to open up other ports to allow the relay.
-
@Mark: By default iptables does not block outgoing connections, but if it does not work for you, try adding this rule: iptables -A OUTPUT -p tcp -m tcp –dport 25 -j ACCEPT
-
Like Arunava, if I used the command to save the iptables suggested in the article, I too was denied permission. The Red Hat Enterprise 6 manual says to use “service iptables save” to save the iptables. I used this command and the system reported the rules were saved to /etc/sysconfig/iptables.
-
-
Hello. I create the bash script. Check please iptables -F iptables -X iptables -t nat -F iptables -t nat -X iptables -t mangle -F iptables -t mangle -X iptables -P INPUT DROP iptables -P FORWARD ACCEPT iptables -P OUTPUT ACCEPT iptables -A INPUT -i lo -j ACCEPT iptables -A INPUT -p tcp -m tcp –tcp-flags SYN,ACK,FIN,RST RST -m limit –limit 1/s -j ACCEPT iptables -I INPUT -m conntrack –ctstate NEW,INVALID -p tcp –tcp-flags SYN,ACK SYN,ACK -j REJECT –reject-with tcp-reset iptables -I INPUT -m conntrack –ctstate NEW -p tcp ! –syn -j DROP iptables -I INPUT -p icmp -f -j DROP iptables -A INPUT -p tcp -m state –state RELATED,ESTABLISHED -j ACCEPT iptables -A INPUT -p udp -m state –state RELATED,ESTABLISHED -j ACCEPT iptables -A INPUT -m state –state RELATED,ESTABLISHED -j ACCEPT iptables -A INPUT -p icmp –icmp-type 3 -j ACCEPT iptables -A INPUT -p icmp –icmp-type 11 -j ACCEPT iptables -A INPUT -p icmp –icmp-type 12 -j ACCEPT iptables -A INPUT -p tcp –syn –dport 22 -m recent –name dmitro –set iptables -A INPUT -p tcp –syn –dport 22 -m recent –name dmitro –update –seconds 30 –hitcount 3 -j DROP iptables -A INPUT -p tcp –dport 22 -j ACCEPT iptables -L –line-number echo echo “Adding DONE, maybe OK” echo “Saving to rc, PSE wait!” service iptables save echo service iptables restart echo “Done” service iptables restart service network restart service openvpn restart iptables -A INPUT -p tcp –dport 8083 -j ACCEPT iptables -A INPUT -p tcp -m tcp –dport 80 -j ACCEPT iptables -A INPUT -p tcp -m tcp –dport 443 -j ACCEPT iptables -A INPUT -p tcp -m tcp –dport 25 -j ACCEPT iptables -A INPUT -p tcp -m tcp –dport 465 -j ACCEPT iptables -A INPUT -p tcp -m tcp –dport 110 -j ACCEPT iptables -A INPUT -p tcp -m tcp –dport 995 -j ACCEPT iptables -A INPUT -p tcp -m tcp –dport 143 -j ACCEPT iptables -A INPUT -p tcp -m tcp –dport 993 -j ACCEPT iptables -A INPUT -p tcp -m tcp –dport 22 -j ACCEPT
-
@timepiece: I’m not sure what you mean — are you having any problems with that script?
-
Kamal Nasser: it’s work. I’m interesting, this script is normal? Can i use it?
-
@timepiece: I don’t recommend downloading scripts and just running them. I suggest you read it and learn what each line does and then write your own rules based on what you need.
-
i did everything in this tutorial …. after doing this none of my subdomains dosen’t work anymore , i have zpanel installed …. i flushed all the rules but now i can’t connect neither to ssh neither to my website (nor www.domain.com nor domain.com) somebody has a solution ? i keep flushing the rules and still can’t get it to work. sorry for my bad english
-
ok now i flushed all and executed: iptables -p input acccept… now… , how can i secure my droplet and still have access to subdomaines i want to remind you all that i have zpanel installed …. please help 😀 , thanks in advance
-
@pcristian06: Which port is zPanel running on? See the Open up ports for selected services section.
-
I want to use my drop as pptp server to. Please help me to combine this firetabs with iptables -t nat -A POSTROUTING -o eth0 -j MASQUERADE
-
@higet: You just have to run that command as root and pptp should work.
-
I entered: iptables -A PREROUTING -t nat -i eth1 -p tcp –dport 80 -j REDIRECT –to-port 8080 to redirect port 80, I am now trying to undo that and have entered both sudo iptables –flush and sudo iptables -F to no avail, no error and port forwarding still taking place. Any clues? thanks!
-
@loranbriggs: Try
sudo iptables -D PREROUTING -t nat -i eth1 -p tcp --dport 80 -j REDIRECT --to-port 8080It should delete the rules. -
I used this guide but now unable to install anything using yum. I get “Temporary failure in name resolution” error. When I stop iptables, it works fine. Please advise.
-
hi, I use this tutorial and then my FTP client (filezilla) can’t connect to the server. I’ve open the port 21 for the FTP but it stuck at: Command: PASV Response: 227 Entering Passive Mode (162,217,250,73,163,48) Command: MLSD


88 Comments